This document shows you how to create Master records using the Xmetal template developed at OUCS for the needs of the Jain Cataloguing Project at the Bodleian library. It assumes you have some previous experience of using Windows, and also of the basic structure of Master records. (Seehttp://www.tei-c.org.uk/Master/Reference/ for reference information on this). A little knowledge about Xmetal would not go amiss either.
It also assumes you have followed the installation instructions for the Master template correctly and the process has completed successfully. In fact, the main purpose of this document is probably to check that it has!
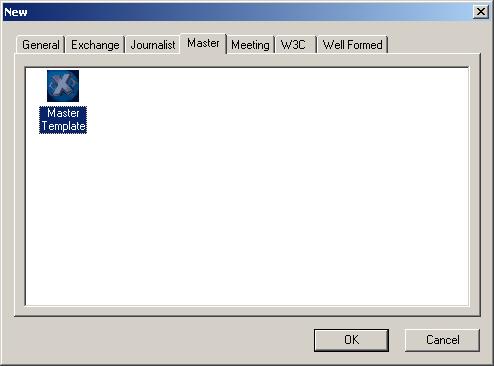
Click on the Xmetal icon to launch the program. Select New from the File menu. A dialog box should open with
different tabs corresponding to the available document types defined on your
Xmetal installation. Select the tab called Master. The dialog should now look like this:
If it does not, something went wrong during installation. If it does, click the OK button
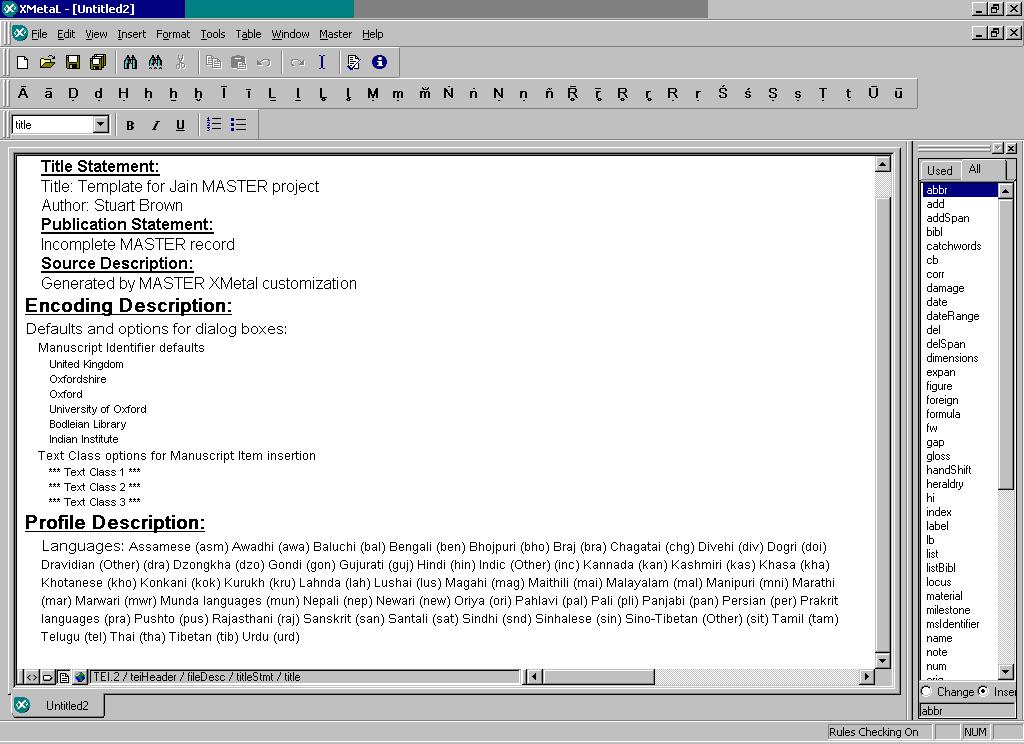
The effect of this is to open a template file which is used for all
Master records. This template contains information about the codes used for
languages in the records, and a number of other defaults: it should look like
this
 .
.
If it does not, something went wrong during installation. The most likely explanation is that a previous Xmetal installation did not complete correctly. The easiest way to sort this out is to use the Windows file search mechanism to locate all files on your system created by the installation procedure, delete them, and re-install. This is further described in the installation instructions.
You can modify the template as needed, for example to add a new
classification code, but for the moment, you should leave it unchanged. It is
displayed first because the first thing you have to do when making a new Master
record is to copy this template into it. This is done for you by the system. If
you look at the Xmetal toolbar, you should see that a new menu, unimaginatively
calledMaster, is now available
Select this menu and look at the available commands.
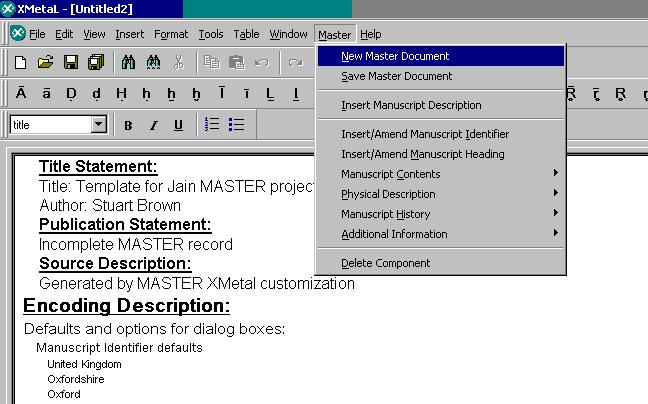
Select New Master Document to create a new record. (If you wanted to edit an existing Master
record, you should have selected "Open" from the file menu at the start, rather
than "New"). The system will then prompt you for details such as the name of
the file in which you want to save the record and your name. It is up to you
how you answer these prompts, but it would obviously be a good idea to have
some institution wide conventions about locations and names for documents of
this kind.
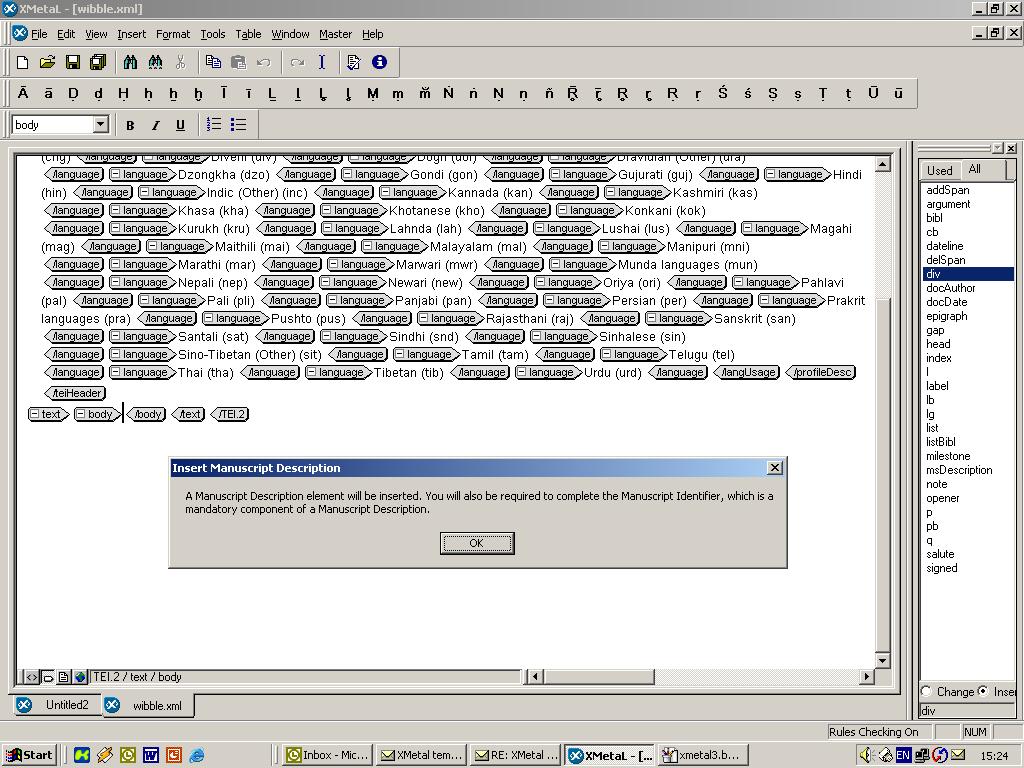
A new Master record is a single TEI.2 conformant document, containing a teiHeader (copied from the Master template) and a single text element. The TEI DTD allows you to put manuscript descriptions at a number of different places within this structure; it also permits you to insert multiple manuscript descriptions in a single document if so desired. However, for simplicity, we will assume you are going to put each manuscript description in its own file. As soon as you start a new Master document, therefore, the system will create a new TEI.2 element, with a text and a body, into which it will insert a manuscript description.
The Master DTD requires that every manuscript description contains a manuscript identifier. As soon as you insert a new manuscript description therefore, the system will request information for its manuscript identifier, as the alert below advises you:
The manuscript identifier has a large number of subcomponents, most of which are going to be the same for every record you create. For that reason, the first of the two dialog boxes that request information for the manuscript identifier is ready filled with default values, which are taken from the Master template:
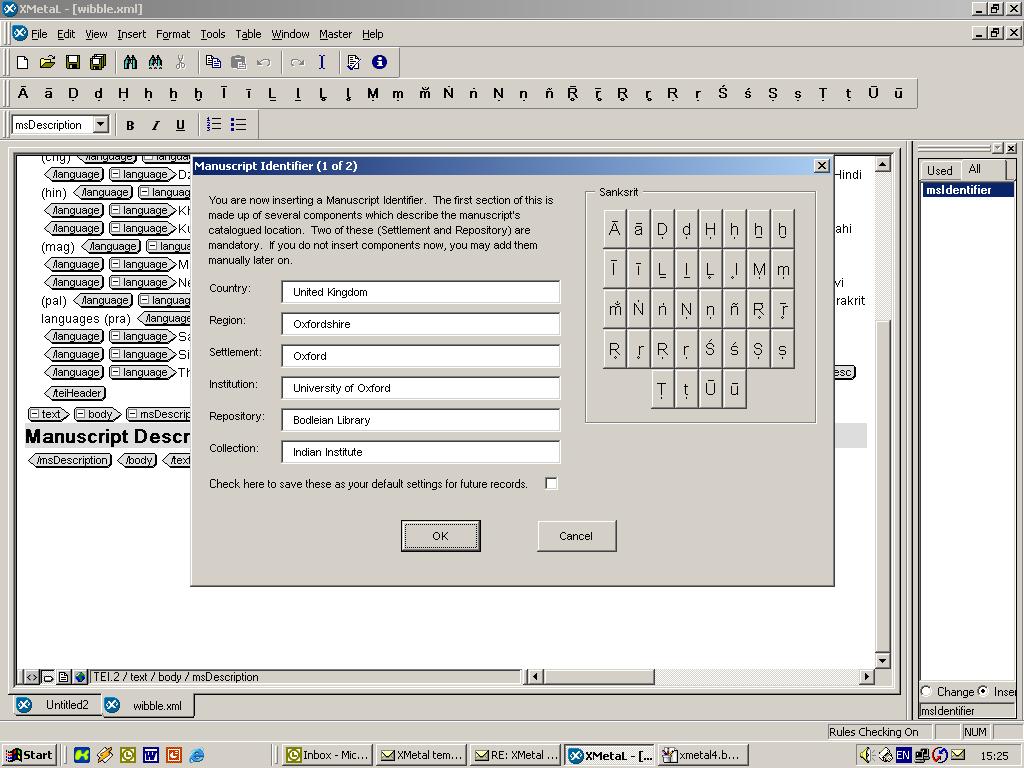
You can, of course, modify these values just for the current record, or you can change them for this and all subsequent records by clicking the check box at bottom right. (This will change the Master template from which new Master documents are created, as previously described)
Click on OK to proceed to the second part of the Manuscript Identifier:
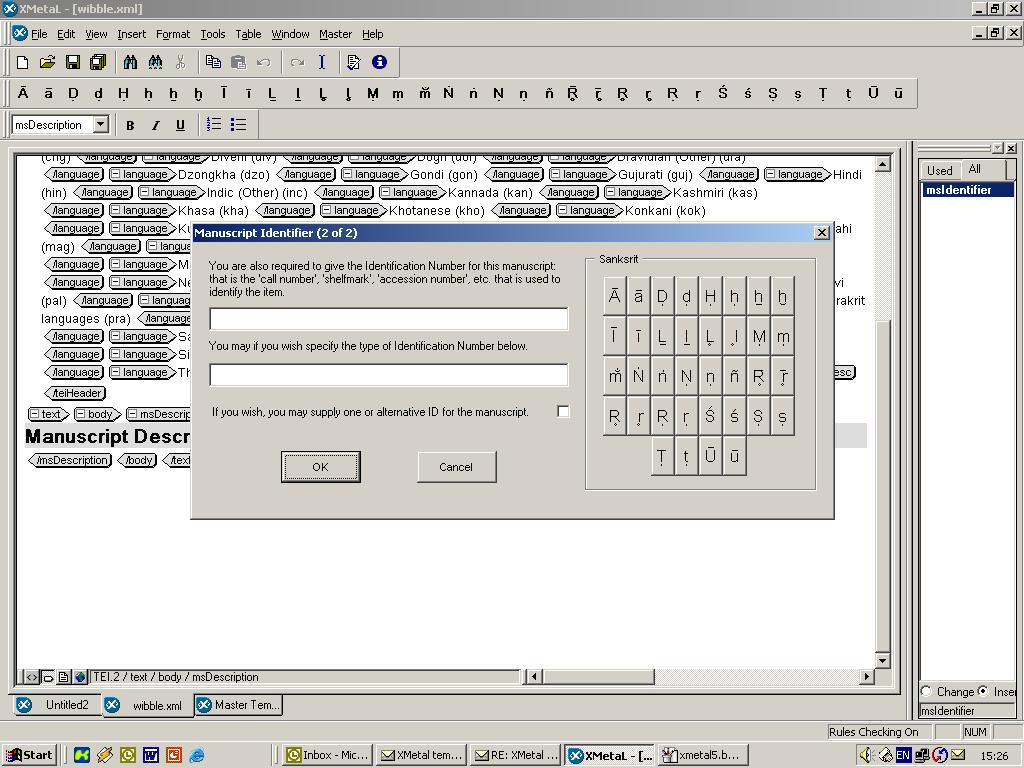
Supply the manuscript identification number or shelfmark. If there is more than one of these, clicking the check box at bottom right will allow you to supply as many such numbers as you like by repeating this dialog. Otherwise, when you click the OK button, the system will assume you have completed the manuscript identifier, which is the only mandatory part of a manuscript description, and will return you to a display like this:
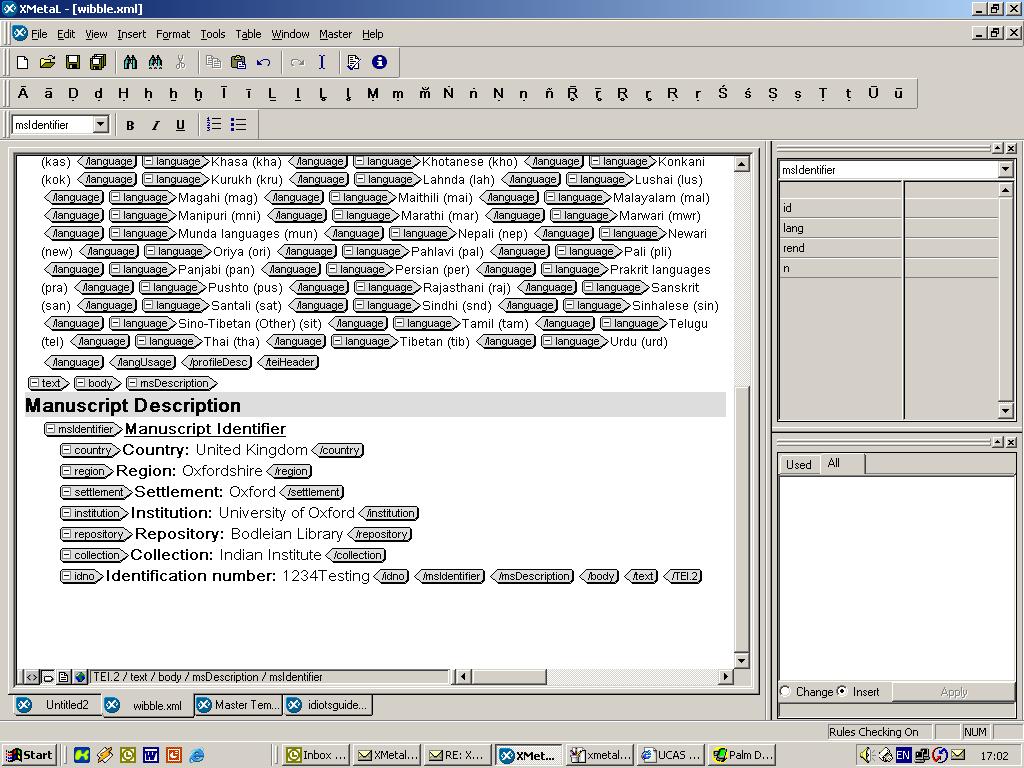
If you want to go on adding more components of this manuscript record, choose the appropriate subsection of the record from the Master menu at the top. You can add a simple manuscript heading element, or you can choose one of the four major subdivisions of the master record: ms contents, physical description, ms history, or additional material. In each case a series of dialog boxes will appear explaining what is required in this section and offering you options.